How to set up your public website
You can make changes to your public website by choosing Settings from the top of the dashboard and selecting the Public website link from the left-hand side.
The easiest way of viewing any changes you have made is to have two browsers open. For example, Chrome and Internet Explorer. You would then need to log in to the dashboard on one of these browsers as an administrator and use the other browser to view the public website from a customer point of view. (Note: You will not be able to view both at the same time when using the same internet browser). Make the changes in the dashboard and refresh the view as a customer to see any changes as you go.
The main page will present you with some of the general settings that you can change such as:
Activate the public website - this will force customers to login to the new public website.
Hide the site name banner - hide the banner showing the site name on all pages.
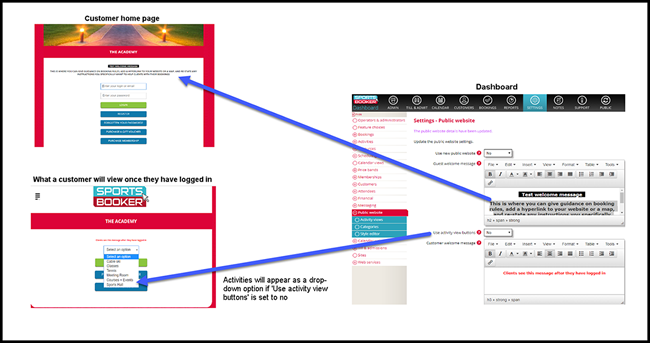
Activity view selection option - choose how to display the activity views with individual buttons for each view or a drop down list of options.
Enable link to disclaimers - display a back to my bookings button on the disclaimer portal that returns the customer to the public website and display the complete disclaimers button on the public website.
Display activity request option - display a request an activity button on the public website that will allow a customer to send a request for an activity.
Guest welcome message - this appears on the page when a guest first visits the site above the login options
Customer welcome message - this message appears on your home page when a customer is logged in.
Bookings information - this message appears on the customer's bookings page and may contain your cancellation policy or cancellation instructions.
Question page instructions - this message appears during the booking process if there are any booking questions to be answered.
Gift voucher page instructions - this text will appear on the gift voucher purchase page to provide instructions on the use of vouchers.
Reservation page instructions- this message appears on above the reservation booking option.
Request page instructions - this message appears on the request an activity page.
Analytics code script - paste in your analytics script for the public website.
Disable edit order item - disable the option to edit an order item in the order basket.
Disable outstanding balance - disable the option to add the outstanding balance to an order basket.
Enable link to disclaimers - display a back to my bookings button on the booking portal that returns the customer to the public website and the complete disclaimers button on the public website.
Payment notice period required - the number of minutes required to allow the payment process to be completed before a booking notice period is due to expire. This can avoid a situation where a person tries to process a payment for a session that is about to be closed, but takes too long to make the complete the payment. Therefore providing a payment for a session they can no longer book.
After making your changes click Update details.
To make further changes to your public website you will need to read the following how to guides:
1. How to set up your activity views:
http://support.sports-booker.com/public-website/how-to-set-up-your-activity-view
2. How to choose your type of activity view:
http://support.sports-booker.com/public-website/how-to-choose-your-type-of-activity-view
3. How to add categories:
http://support.sports-booker.com/public-website/how-to-add-categories
4. How to make changes in the style editor:
http://support.sports-booker.com/public-website/how-to-make-changes-in-the-style-editor
5. How to select the menu options available to customers:
http://support.sports-booker.com/public-website/how-to-select-the-menu-options-available-to-customers