2. How to set up MemberChecker
Contact support@sports-booker.com in order to add a Memberchecker license to your site if you have not already.
You will also need to ensure you have followed the pre-configuration set up instructions. These will vary depdening on the type of scanner you have. Follow the relevant instructions below and then return to this page.
Honeywell Genesis 7580 pre-configuration set up - http://support.sports-booker.com/member-checker/honeywell-genesis-7580-pre-configuration-set-up
Honeywell MS7120-38 Orbit pre-configuration set up - http://support.sports-booker.com/member-checker/honeywell-ms7120-38-pre-configuration-set-up
If this is the first time that the application has been installed, the settings screen will be shown. The settings screen can be seen below.
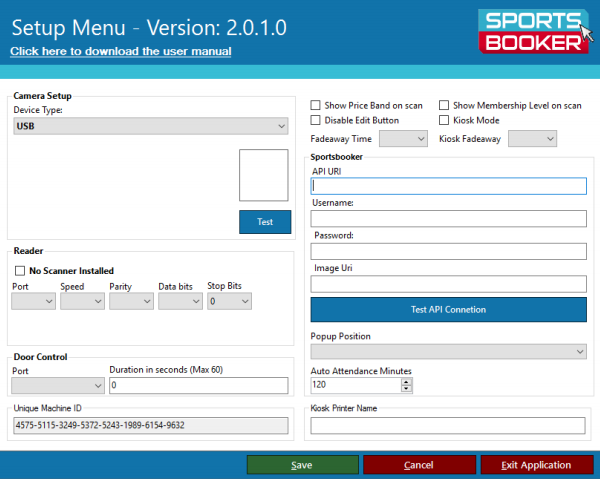
Unique Machine ID
Once installed the Unique Machine ID (At the bottom of the screen) needs to be communicated to Sports-Booker admin, this will be used to generate the licence and activate the product.
The Setup Screen
The Setup Menu allows all the setting for the system to be set, each section of the screen is explained below.
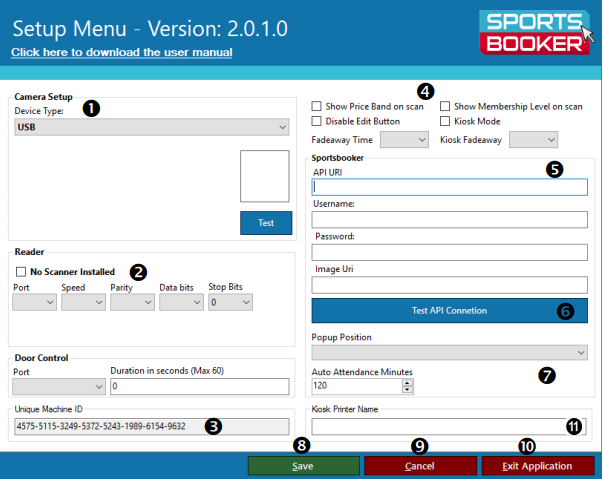
1. Camera Setup allows the set-up of a camera on the computer. The Device Type can be set to USB (for Web Cams) and Ethernet for cameras attached to the computer via the network. If the Camera is set up as an Ethernet Camera an extra set of options is shown below the Device Type, these can be seen below.
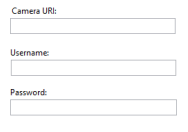
The Camera URI is the address of the camera, this could be an IP address or an internet address. The username and password are the credentials required to access the resource.
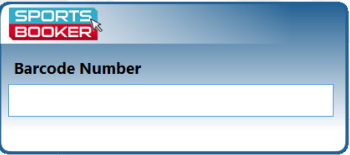
2. The ‘No Scanner Installed’ will cause the Barcode screen to be shown during the time that the application is running. This replaces the functionality of the scanner and allows the barcode number to be typed in instead of the barcode being scanned. The Barcode screen can be seen below.
The COM Settings allows the set-up of a scanning device and if required a gate/door opener.
The Port for the device can be found in the Device Manager -> Ports

The Device will be listed below the Ports section of Device Manager and the COM port will be listed in brackets next to it. This port number should be selected from the drop down list.
The setting for Speed, Parity, Data Bits and Stop Bits are specific to the scanning device that is installed on the computer. These settings should be available from the manufacturer of the scanning device. The default settings (Speed-9600, Parity-None, Data Bits-8, Stop Bits-1) will however work for most devices.
The Door Control settings are similar to that of the scanner and appropriate port can be found under the Port settings in Device Manager. The duration specifies how long the opening control will remain open before locking again. This should be set to a value that allows a customer to swipe their access card and make it through the access gate comfortably.
3. The Unique Machine ID, is generated for the computer that the software is installed on, this is a unique number generated by the software which identifies the computer for licensing purposes.
4. Show Price Band on Scan, if checked the Price Band of the Member will be shown on the popup screen. Show Membership Level on Scan, if checked the Membership Level for the Member will be shown on the popup screen. Disable Edit Button, disables the edit button on the popup screen, this is used in scenarios where the user scanning the card should not be allowed to edit the customer details. Kiosk mode sets Kiosk mode for the application, the details for this can be shown above. Fadeaway Time and Kiosk Fadeaway Time sets the time in seconds that the relevant popup remains on the screen.
5. The SportBooker settings allow the system to ‘log in’ to SportsBooker to access the information required. The API URI will be the same URI that you enter into the URL in a browser to access SportsBooker with ‘/webservice’ at the end. The Username and Password will have been provided to you when SportsBooker was originally set up.
6. The ‘Test API Connection’ button allows the system to check that the settings entered are correct. If the settings are correct a white tick is show on the right hand side of the button, if they are incorrect a red cross is displayed. This button must be clicked before saving the changes to the settings.
7. The Popup position tells the system where to display the popup, the popup can be moved after it is displayed but the startup position will be whatever is set. Auto Attendance Minutes is the time period in which MemberChecker book a member in to classes booked in Sport Booker. The system also allows for members to be up to 15 minutes late so adds this to the time period for marking classes as attended. If Auto Attendance Minutes is set to 120 minutes the system marks the member in to any classes that fall in between now (minus 15 minutes for the lateness allowance) and 120 minutes from now. So If Member A has two classes today at 1pm and 2:30pm and swipe their membership card at 12:45pm, the system will mark both classes as attended as both of these classes fall between 12:30pm (the swiped in time minus 15 minutes lateness allowance) and 2:45pm (The swiped time plus the 120 minutes Auto Attendance Minutes)
8. Save, the Save button saves any changes that you have made. Clicking the Save button will cause the following message to be displayed. Before the save will be processed the ‘Test API Connection’ button must be clicked.
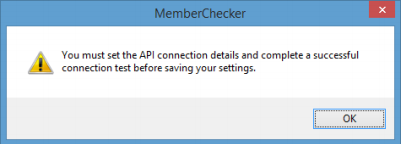
If the setting for the API are correct the button will display a tick.

If the settings for the button are incorrect, the button will display a cross.

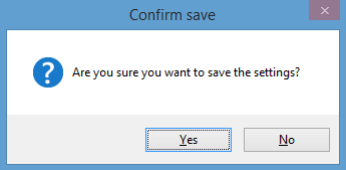
Clicking on the ‘Yes’ button will confirm the Save.
9. Cancel, the Cancel button discards any changes that have been made, clicking cancel will cause the following message to be displayed.
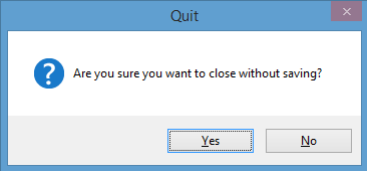
Clicking the ‘Yes’ button will close the settings screen without saving the changes.
10. Exit Application, the Exit Application button closes the appilcation and stops the scanning functionality. Clicking the Exit Application button causes the following message to be displayed.
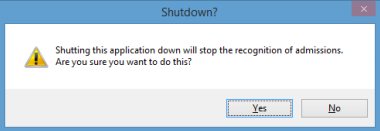
Clicking ‘Yes’ will allow the application to close.

 Search
 Member Checker