How to set up your till
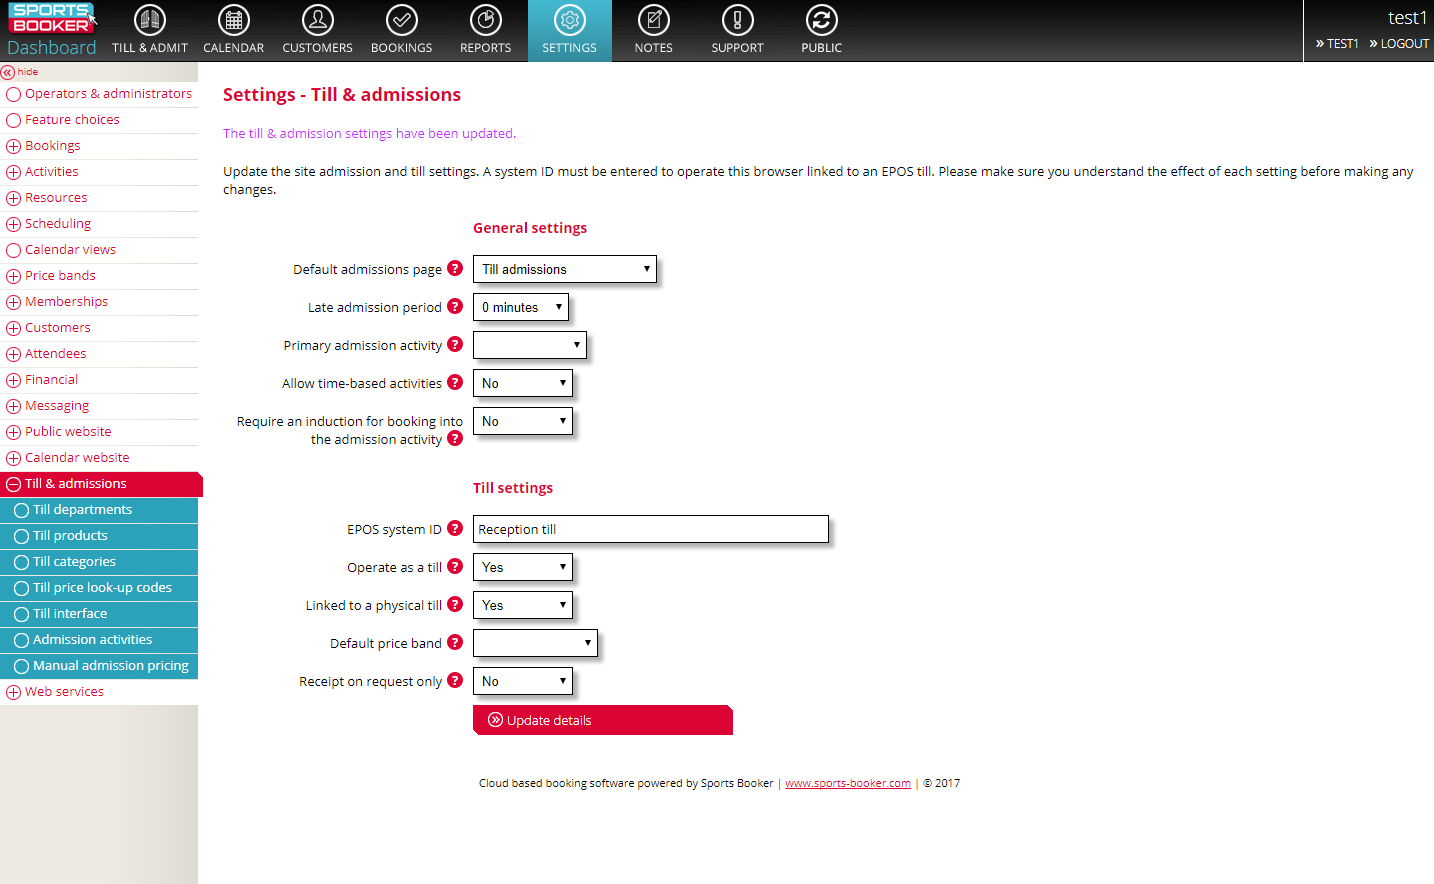
Go to Settings > Till & Admissions.
If admissions is not enabled on your system go to Settings > Feature Choices and tick the Dashboard - Settings - Till & admissions option and Update settings.
Change “Activate 30 day trial for till products” to yes.
Give your till a name – e.g Reception till.
If you use this PC primarily as a till and not for admissions, set the operate as a till to yes.
If you always want to have one price set the default priceband.
If you don’t want to print a receipt every time select receipt on request = yes.
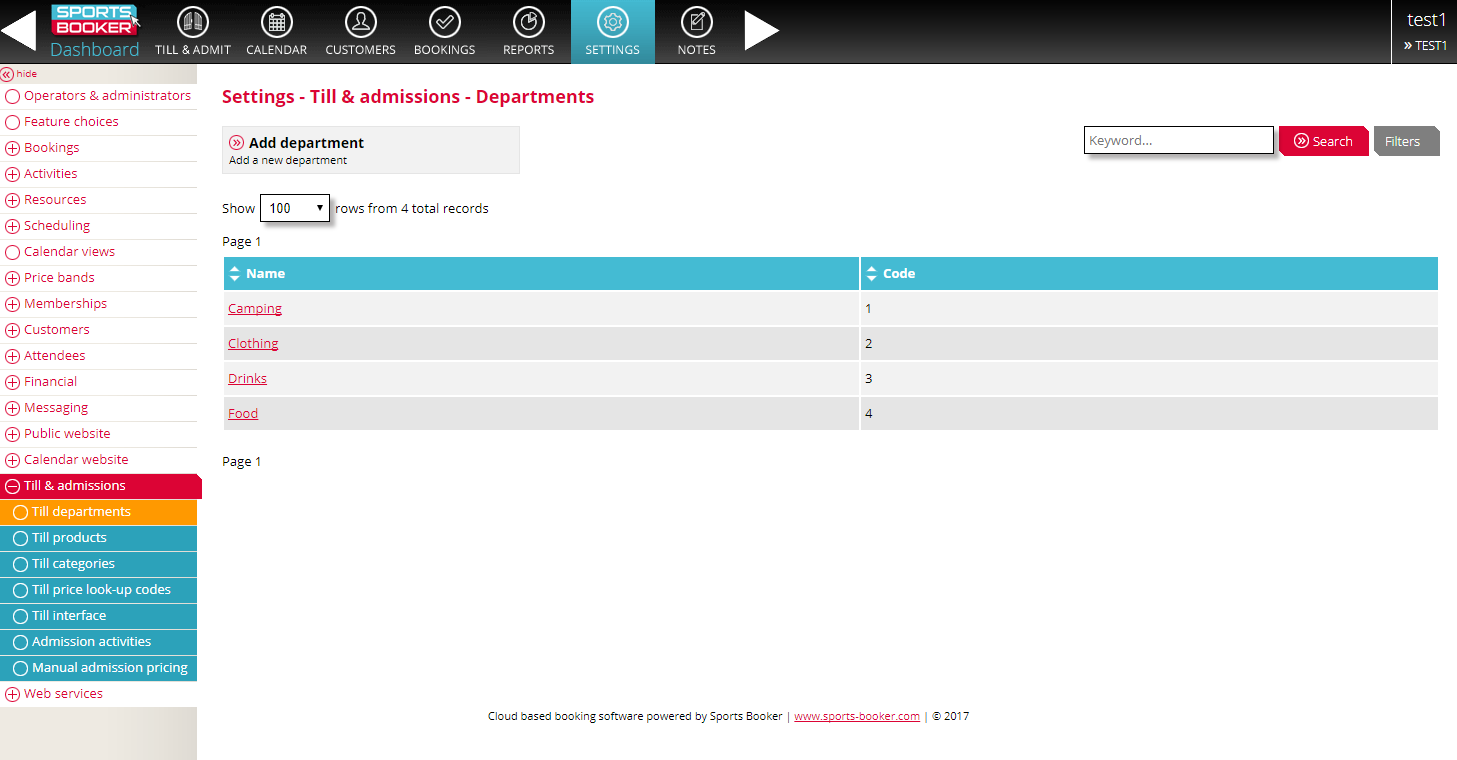
Till departments
Make sure Departments are already enabled by going to Settings > Feature choices and ticking the Dashboard - Settings - Financial - Departments option.
After this, go to Settings > Tills & admissions > Till departments > Add department.
Fill out the details of your Department and then click Update department.
All products and activities can be allocated to a ‘department’ which is used for grouping items in sales reports and also for adding non specific sales of variable amounts.
An example would be the desire to charge for electricity on a camp site, where the amount will vary each time.

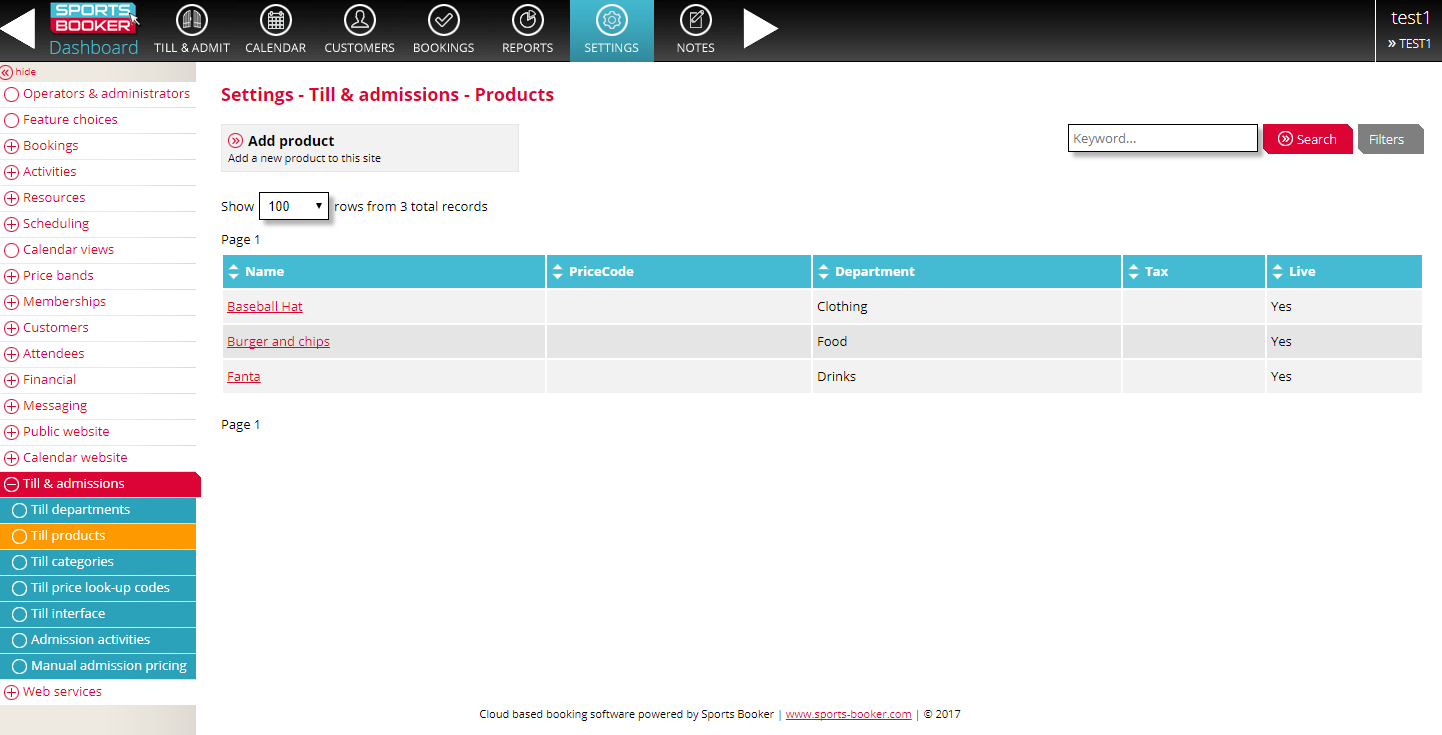
Till products
Go to Settings > Tills & admissions > Till products > Add product.
Choose the Department code from the drop-down options.
Make sure the "Live" option is set to yes.
Input the prices for the different price bands and click Update product.

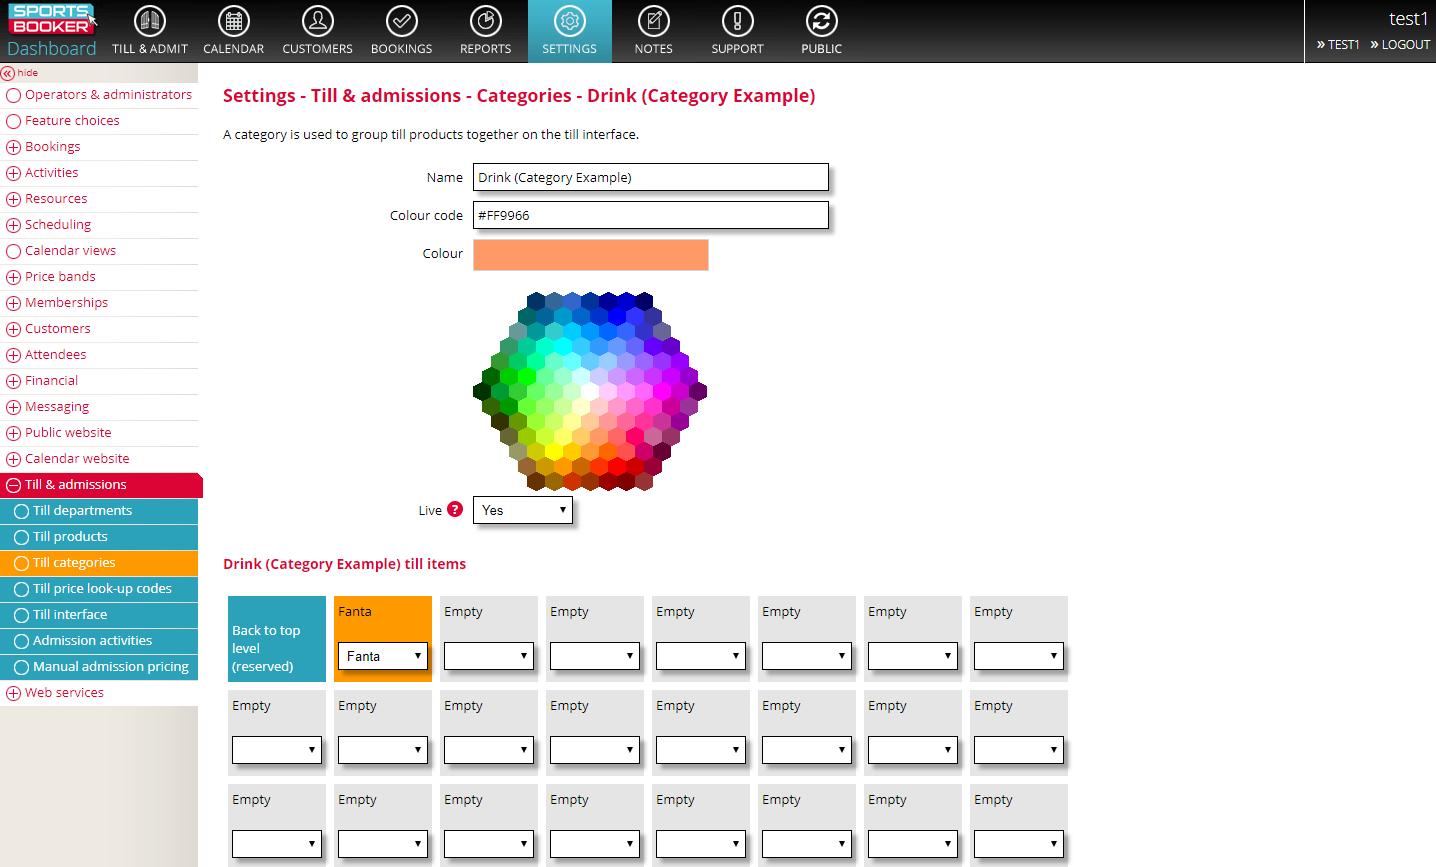
Till categories
Go to Settings > Tills & admissions > Till categories > Add category.
Add a category button which will allow you to then add a second level of till products from the till main page. E.g a category of drinks could have coke, orange, and coffee on the next level.
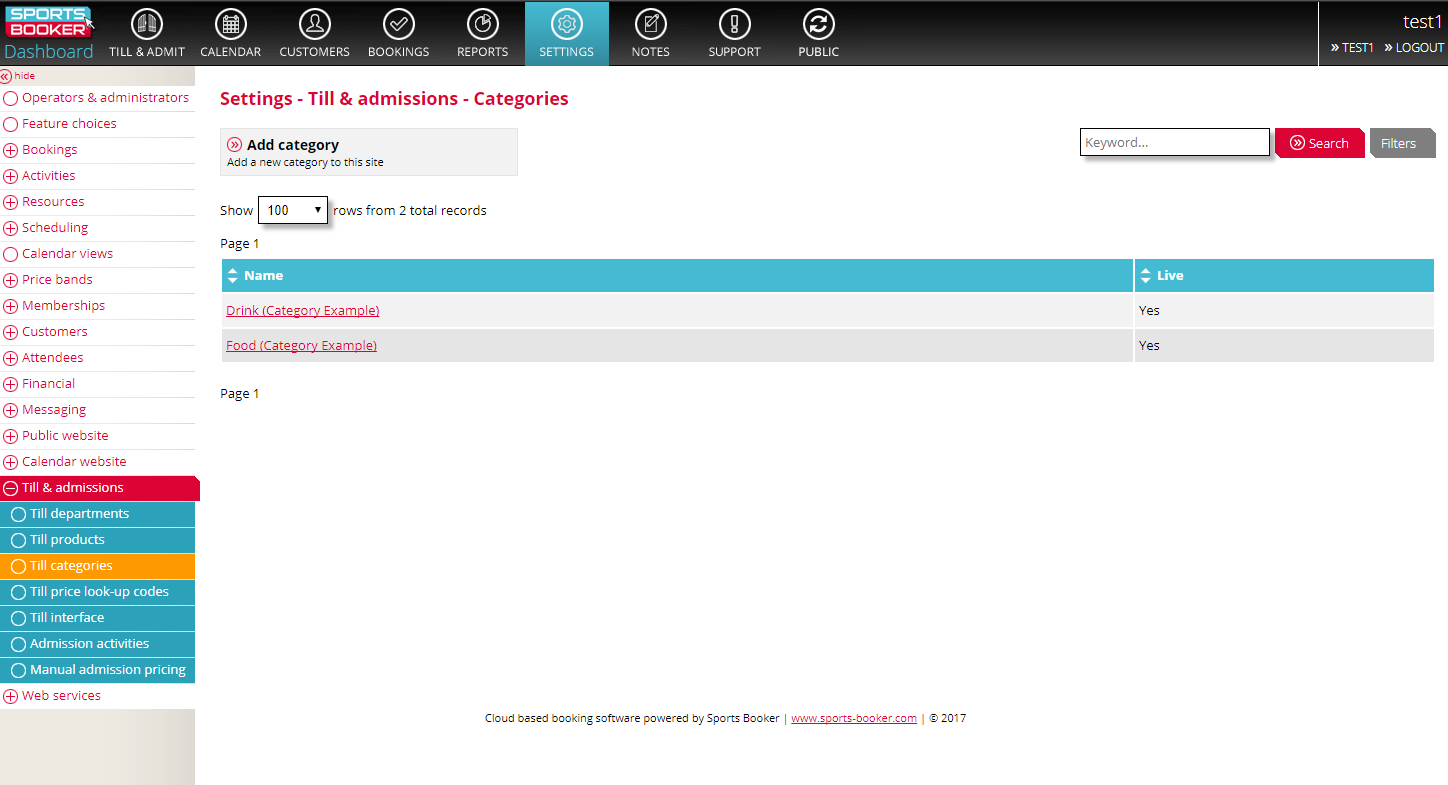
Make sure the "Live" drop-down option is swithced to yes and the click Update category.
Re-enter one of the newly created categories by clicking on it and scroll down to add till products to that category.
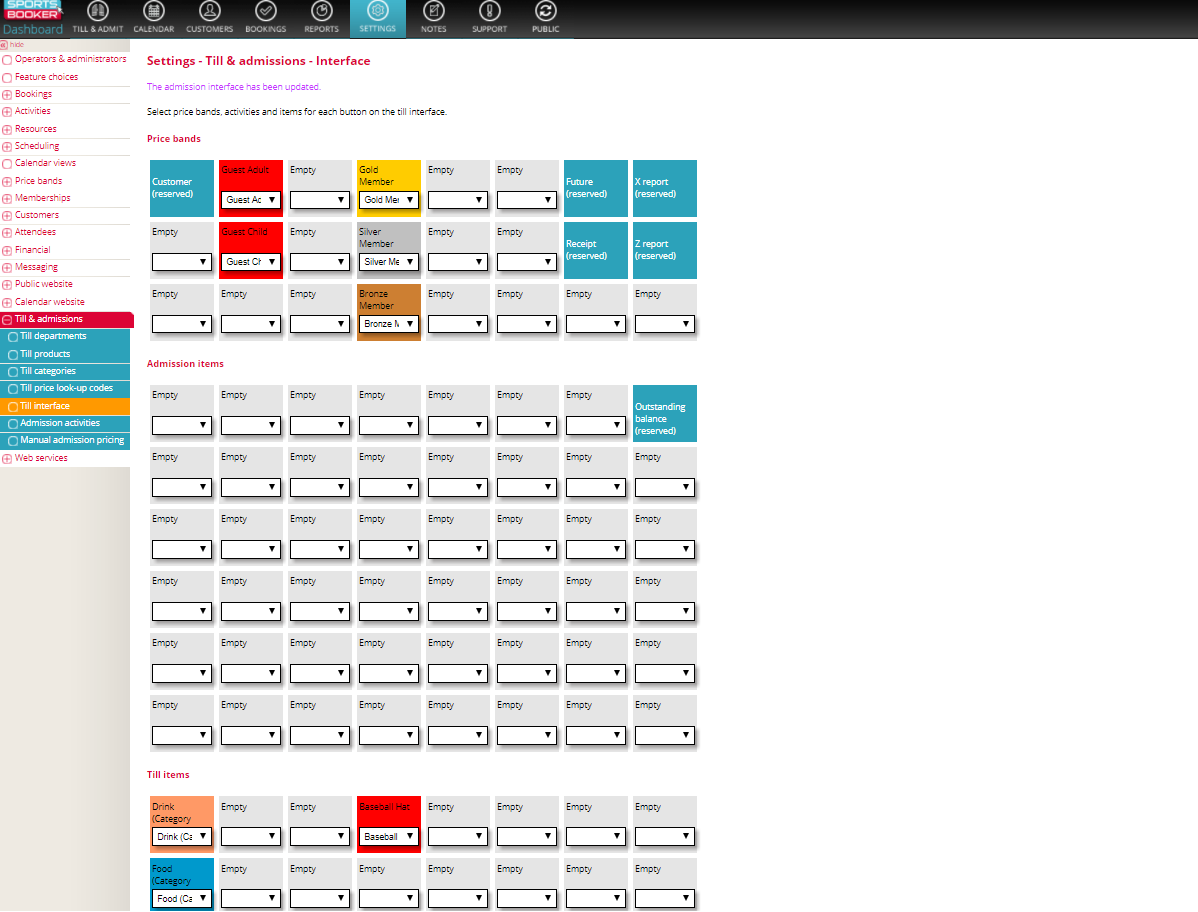
Go to Settings > Till & admissions > Till interface.
Choose an empty square to add your price bands and till items.
Go to Settings > Price bands to change the colour of how your price bands will appear on the till screen.
Once you have entered all price bands and till items click Update details at the bottom of the screen.
Till use
Go to Till & admit at the top of the dashboard and choose a price band. Then click on the Till products button.
Click on items to add them to the basket (in the till roll to the left you can use the red cross to delete them).
For a refund click on the refund button first then add the item, which will appear as a negative amount.
Finally choose either the checkout button top of the page to go to the order basket, go to the calendar for future bookings, or use the quick checkout red payment buttons on the interface to finish the sale and print a receipt (or after the sale click on the receipt button if receipts are on request).
Kiosk printing
If you have a cash drawer and receipt printer attached and are using chrome or firefox you can force the browser to skip the printer selection window and print immediately using the following instructions:
Silent printing in Firefox/Gecko
1. Firefox go to the web address "about:config"
2. Right click on any preference and select "New > Boolean".
3. Type: "print.always_print_silent" and click OK.
4. Select: "true".
5. Restart the browser.
Chrome
1. Find the Chrome shortcut on your PC.
2. Right click and open Properties.
3. In the Target field add this text after the current path to the application: " --kioskprinting".
4. Restart the browser from the shortcut.